
Adjusting Clip Volumes
iMovie gives you two simple ways to adjust general sound levels in your video
clips: reducing the maximum volume or adjusting clip volumes to fit within a
“normalized” range. You make both of these adjustments in the Audio Adjustments
window.
Nondestructive Editing
“Nondestructive editing” means that any change you make to your video (or other
media you add to your iMovie projects) is always reversible if, for example, you
change your mind or don’t like the result. This is because iMovie never alters the
original media that you edit; nor does iMovie create a copy of the original. Instead, it
simply stores the changes you’ve made and displays them every time you watch the
video, without you ever having to save them.
To undo your last action:
m
Choose Edit > Undo [Action].
To restore media to its original state:
1
Select the clip and then click the button to open the tool you used to make the
original edits to the image or sound.
2
Remove the edits you don’t want.
At the end of each topic in this tutorial you’ll find more specific instructions for how
to restore your media to its original state.
Chapter 2
Learn iMovie
31
To open the Audio Adjustments window:
m
Click a clip and then click the Audio Adjustments button.
Setting Clip Volume
If you have a clip that simply is too loud compared to all the other clips or, conversely,
if you find that the sound in one of your clips is too quiet, you can simply increase or
decrease the clip’s volume.
To set the clip’s volume:
1
With the Audio Adjustments window open, click a clip to select it.
2
Drag the Volume slider to the level you want.
3
Click Done to close the Audio Adjustments window, or click another clip to adjust its
volume.
An audio adjustments icon appears at the beginning of the clip, which you can click to
open the Audio Adjustments window and change or remove any audio adjustments
you’ve made. You can restore the clip’s original volume by clicking “Revert to Original”
in the Audio Adjustments window.
Normalizing Clip Volumes
If you have a clip in which the subject is speaking too loudly and another in which the
subject is speaking too softly, normalizing the volume lets you easily reset volumes to
fit within the volume range that you prefer.
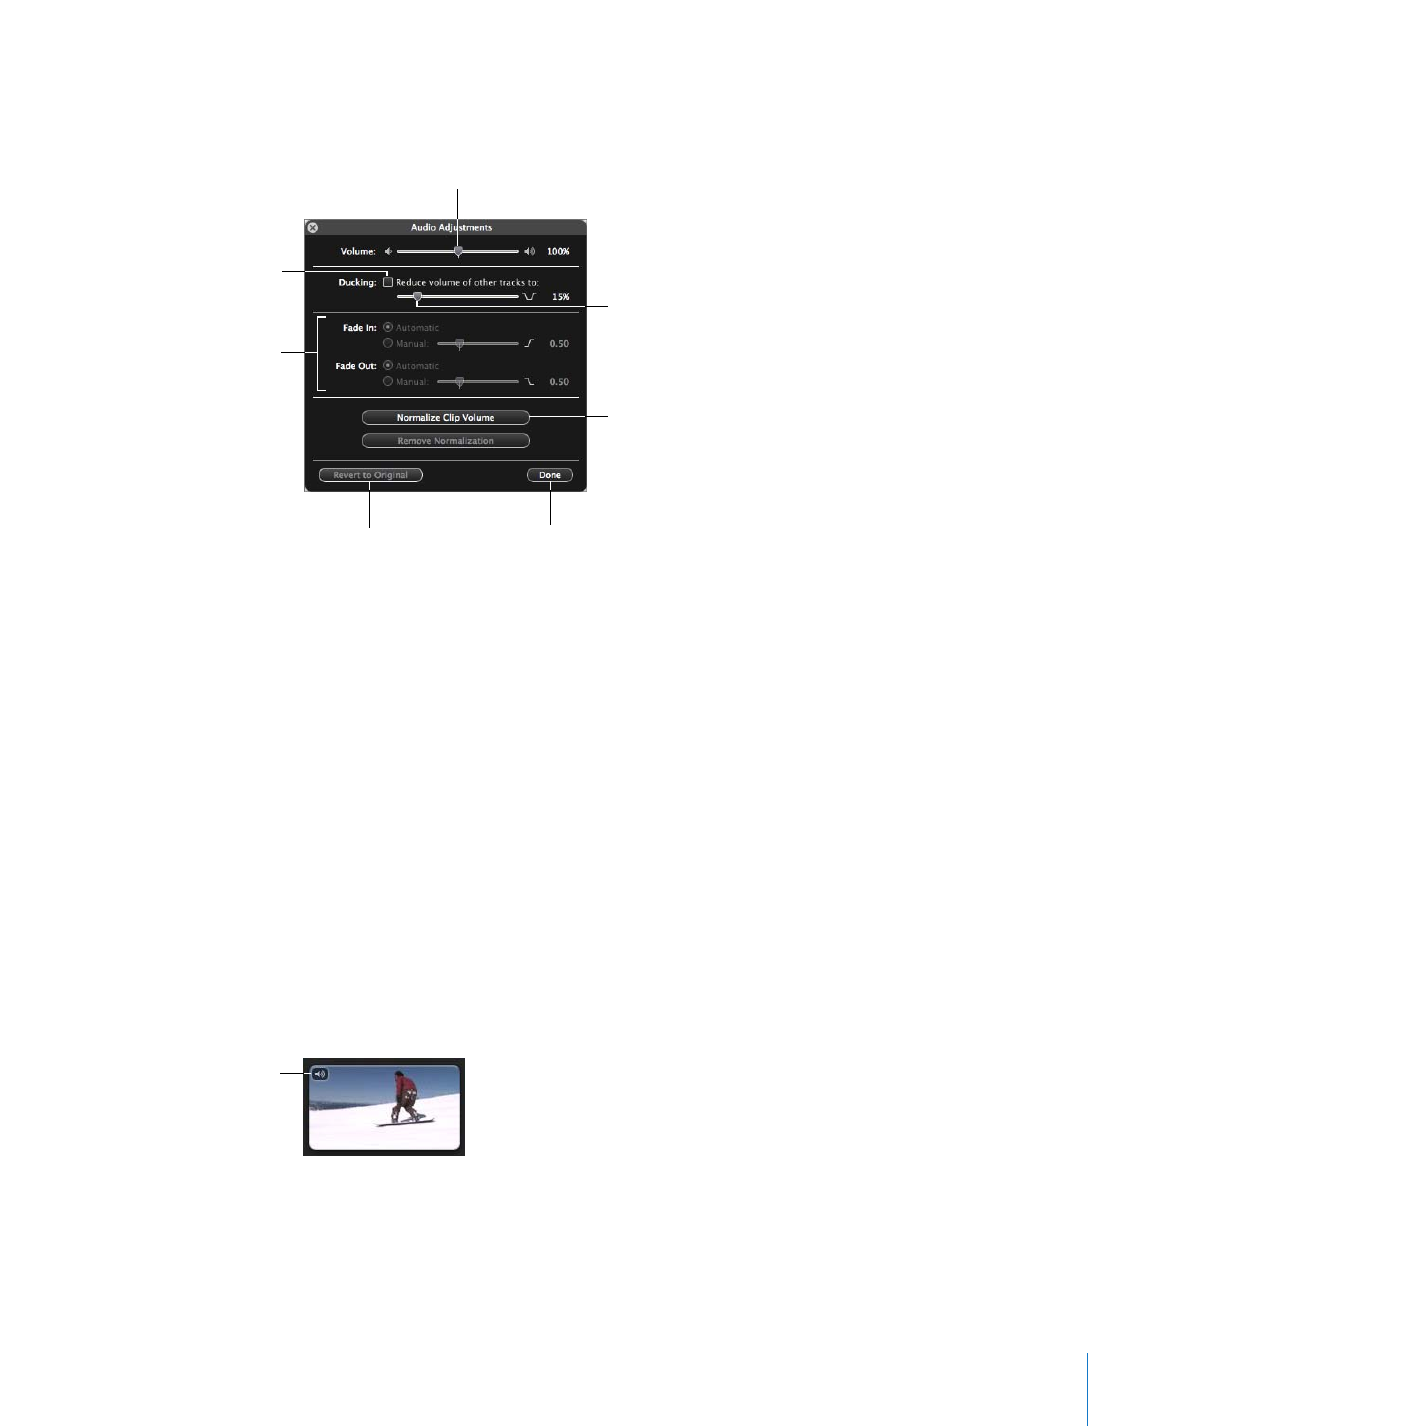
Click to reset the clip’s
volume range.
Drag to set the volume
of the clip.
Click to restore
clip volumes to the
original levels.
Click when you’re
finished.
Select to give the
selected clip’s audio
priority over the
competing audio
of other clips.
Drag to set how much
you want to duck the
volume of other audio
and video clips.
Select Manual and then
drag the sliders to set the
rate at which the clip’s
volume fades in and out.
Audio adjustments icon

32
Chapter 2
Learn iMovie
To normalize volumes across clips:
1
With the Audio Adjustments window open, click a clip to select it.
2
Click Normalize Volume.
This sets the clip volume to its maximum level without distortion.
3
Select another clip, and then click Normalize Volume again.
The volumes of the two clips are adjusted to the same range.
4
Repeat steps 2 and 3 for any additional clips to bring them into the same range.
You can undo audio normalization at any time by clicking “Remove Normalization” or
“Revert to Original” in the Audio Adjustments window.