
Cropping Video Images
Just as you might crop a photograph, with iMovie you can do the same to video,
creating a close-up shot of your chosen subject where you didn’t have one before.
If you’re working with standard or lower-resolution video, cropping the clip may cause
it to appear grainy. With high definition video, cropped clips can look almost as good
as the originals.
Chapter 2
Learn iMovie
29
To crop a clip:
1
Click the Crop button and then click a clip to select it.
2
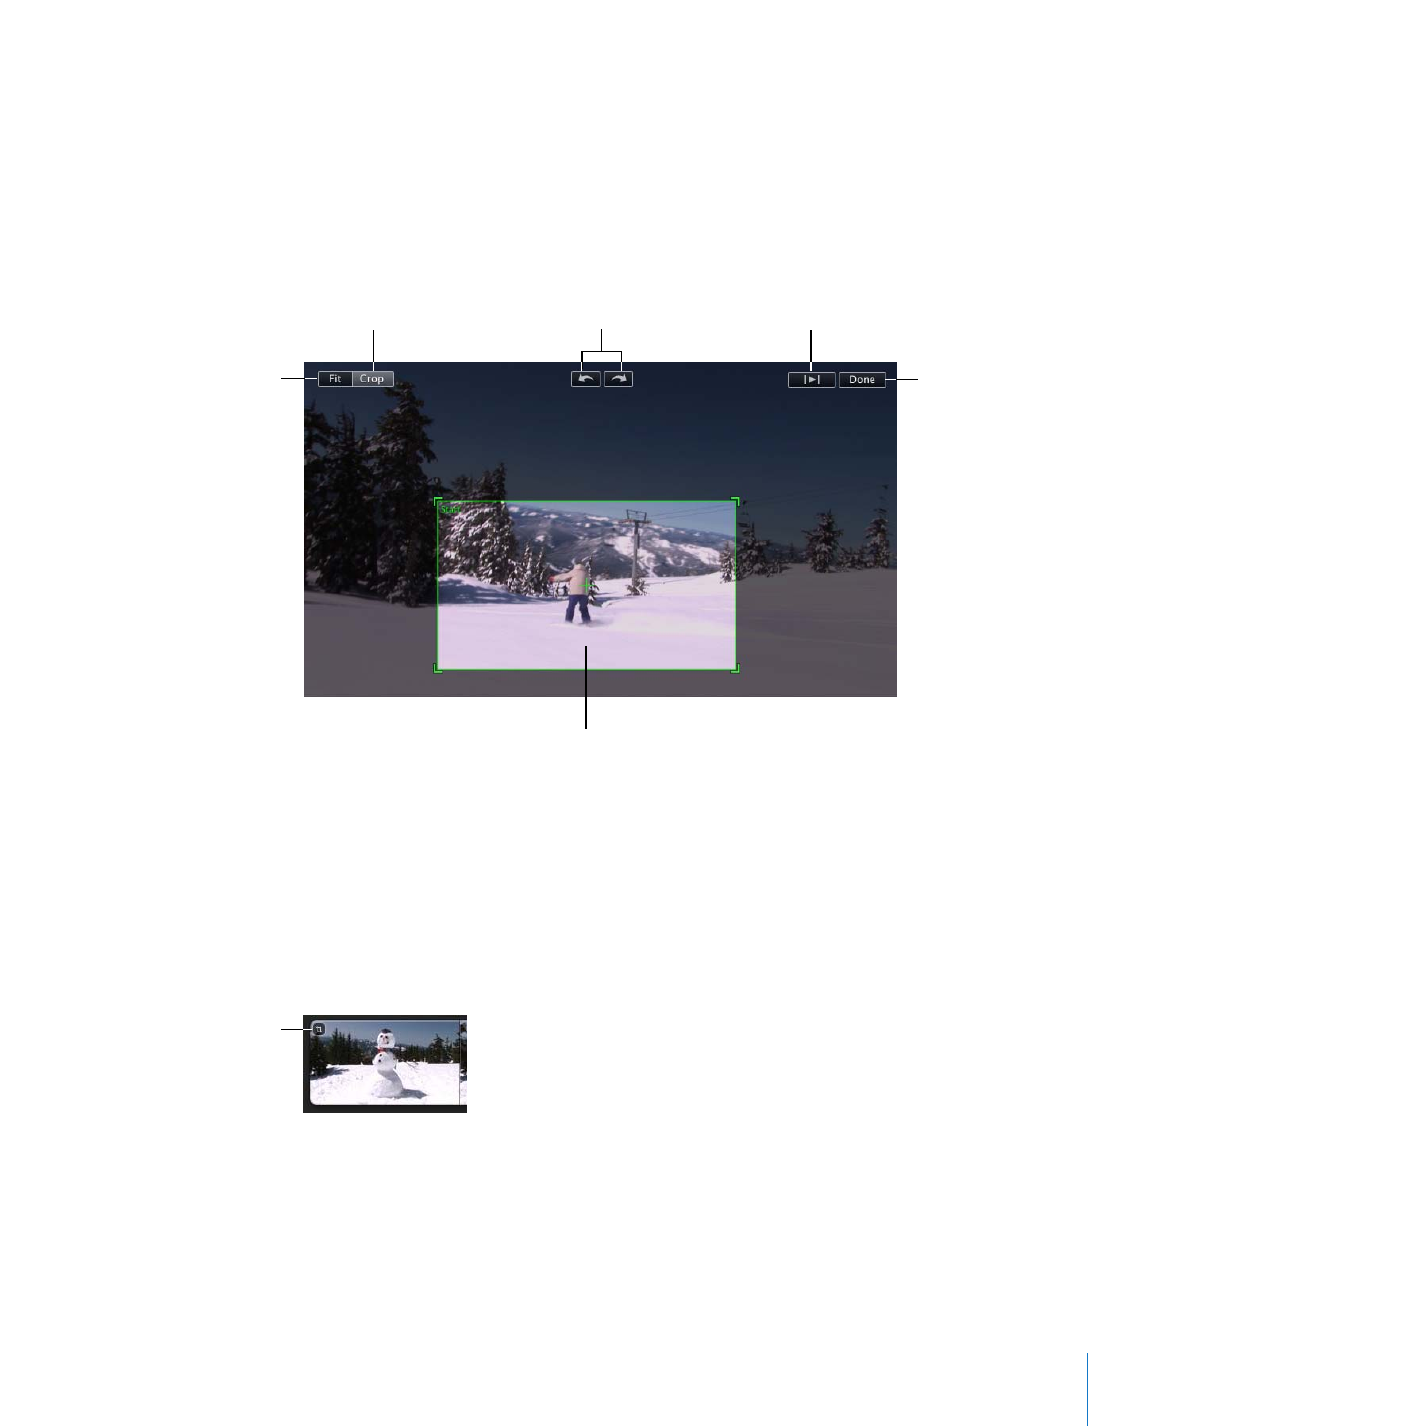
In the viewer, click Crop.
A green crop rectangle appears around the outer edges of the frame in the viewer.
3
Drag the green crop rectangle to resize and reposition it until it highlights the parts of
the image you want to focus on.
The maximum crop is 50 percent of the original image size. The crop rectangle retains
an aspect ratio of 16:9 (widescreen) if no project is selected (otherwise, it matches the
aspect ratio of the selected project).
4
To preview your work, click the Play button.
5
When you like the way it looks, click Done. The crop applies to the entire clip.
You’ll see a crop icon at the beginning of the clip.
Click to preview your
work.
Drag and resize to set size
and placement of crop.
Click to rotate the entire
image.
Click to crop.
Click to restore the image
to full frame.
Click when you’re
done.
Crop icon

30
Chapter 2
Learn iMovie
Click the crop icon to change or remove the crop at any time. You can restore your
video to the original size at any time by opening the crop editor and clicking Fit.